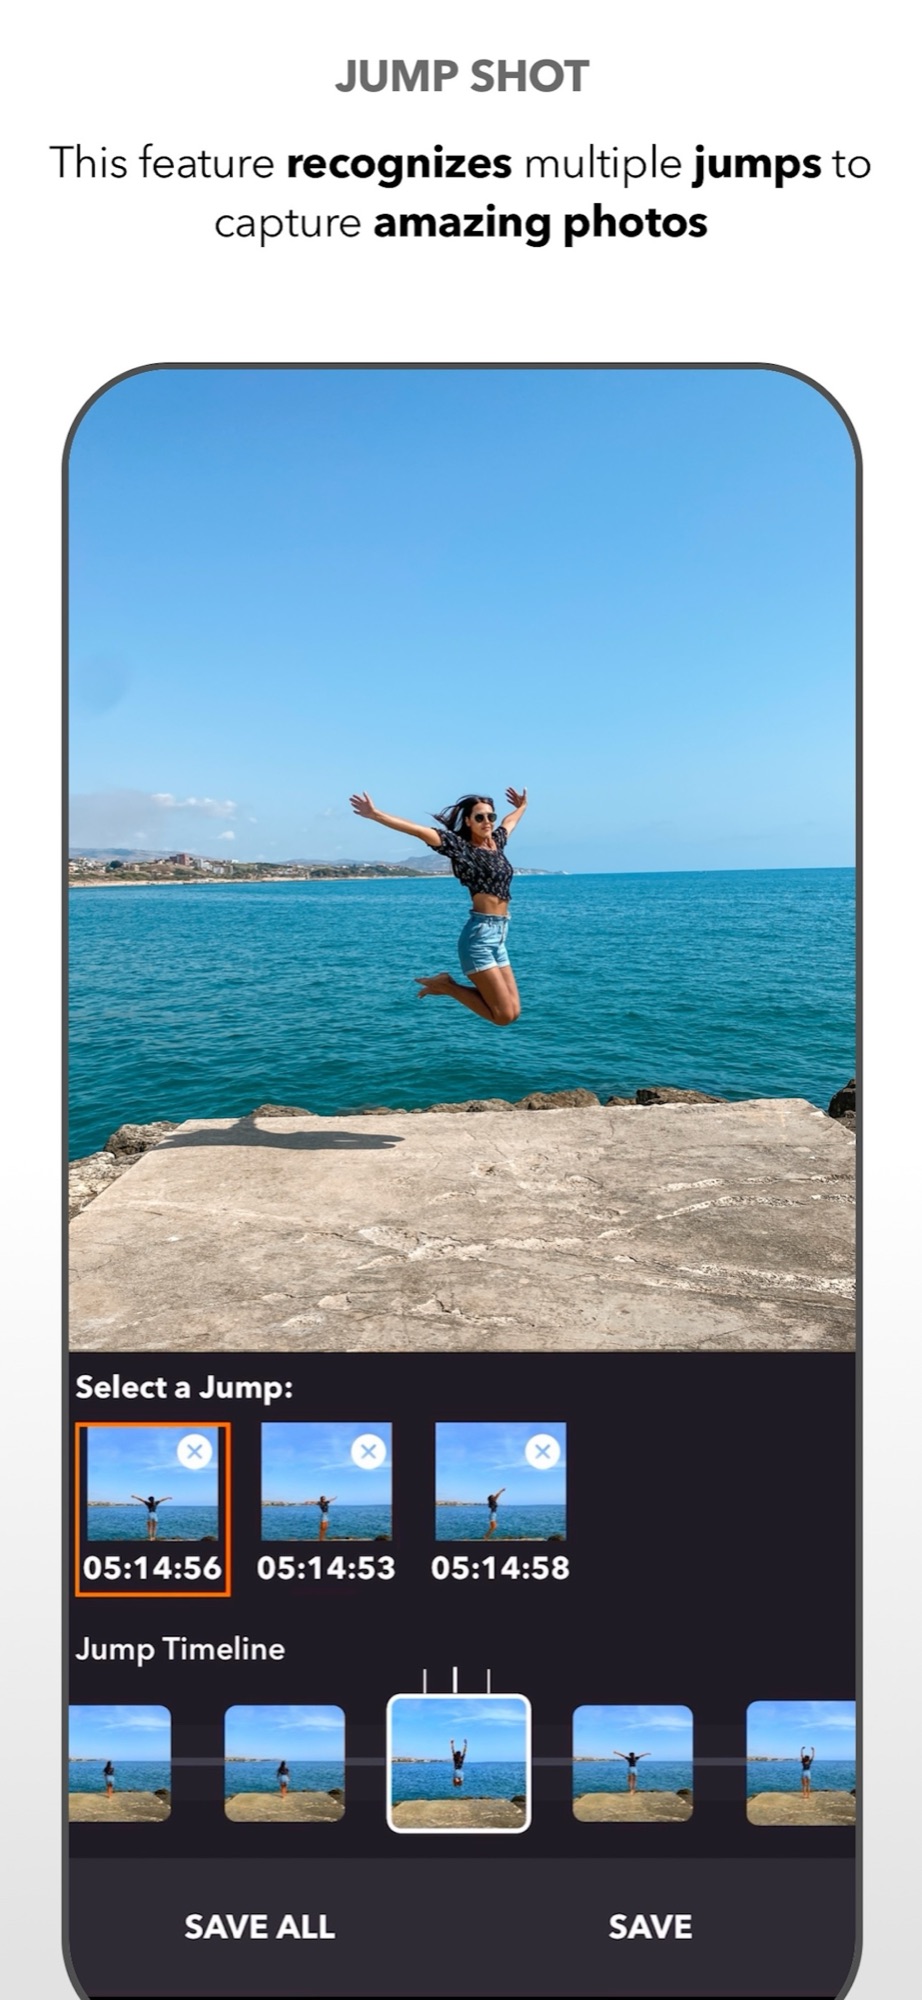
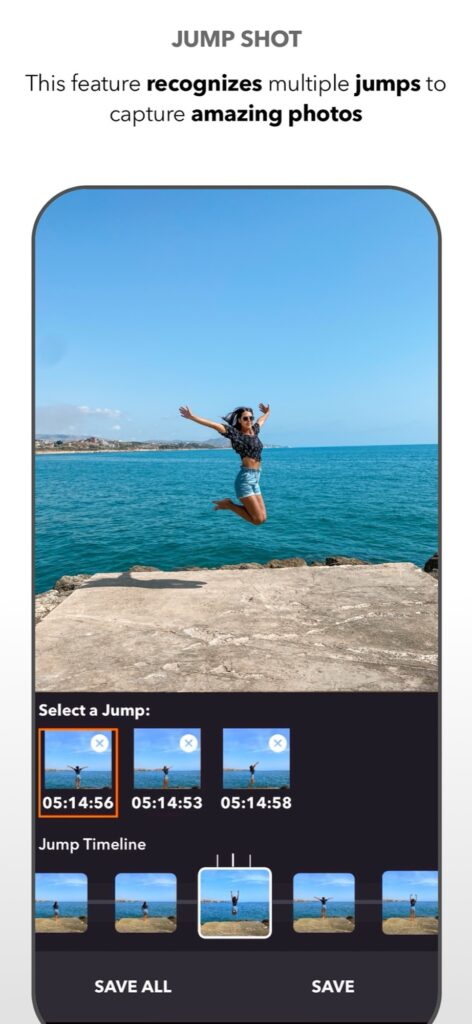
The app finds the highest point
In Jump Shot mode, DSLR Camera calculates the trajectory of the person jumping and takes pictures automatically, with no tap required, when it detects the top of the jump. You concentrate on framing; your friends concentrate on jumping.
The mode recognises multiple jumps in a row, and also bike jumps, skate tricks such as ollies, and other actions where the subject moves vertically from the ground.
A whole session, sorted for you
You do not need to stop after every attempt. Keep the session going: the app extracts the jumps from it and shows the number detected on the shoot button. Afterwards, browse the timeline, compare the moments and save the best images, or save them all.
Set up the scene
Give the jump room: frame wider than you think, with space above the heads. Shoot with plenty of light, outdoors if possible, so that the movement stays sharp. A low camera position makes the jump look higher; a clean horizon behind the subject makes the silhouette readable.
Ask the jumpers to start from a standstill, so the vertical movement is clear. With a group, count down aloud and let the app choose the instant.
For a different kind of hands-free shooting, read about Hand Timer, which starts the countdown with a gesture. All shooting modes are listed in the DSLR Camera overview.
Give the motion enough room
Choose a clear, level area and frame the entire person with space above the head and below the feet. Try one small movement in good light before a full jump. Inspect both the timing and sharpness of the saved frame.
Detecting the jump moment and freezing motion are separate problems. If timing looks right but hands or feet are blurred, use more light or a faster supported exposure rather than repeating the same setup. Keep the phone stable and avoid a busy background that hides the outline. Do not repeat jumps in an unsafe location for the sake of a photo.
Sources and availability
Facts checked on 20 September 2026 against the DSLR Camera listing on the App Store and the developer’s feature notes. Detection depends on light, distance and framing.
Your learning path: from capture to editing
Follow the sequence or choose the problem you want to solve. Scheduled lessons become links when published.
- Manual camera controls on iPhone: shutter speed, ISO, focus and white balance
- Night photography on iPhone: using shutter speed and ISO after dark
- Use Apple Watch as a remote shutter for DSLR Camera
- Hands-free selfie timer on iPhone: start the countdown with a gesture
- AR Portrait: using the iPhone LiDAR sensor for creative portraits
- Bokeh on iPhone: control background blur before and after the shot
- How to take the perfect jump shot with your iPhone
- Shooting RAW on iPhone: when it helps and how to edit the file — scheduled: 13/11/2026
- Edit a photo on iPad with DSLR Camera: a practical order of adjustments
- AI photo filters on iPhone: how Predictive Filters choose for you — scheduled: 20/11/2026
Take control of your iPhone camera
Manual controls, RAW, 200+ filters and an advanced editor in one app for iPhone, iPad and Apple Watch. Updated since 2014.
Get DSLR Camera on the App StorePaid app. Feature availability varies by iPhone model, camera and iOS version.